
- Home
- About
- Portfolio
Crush the Match – Medical School and Residency Platform
Food¢ense – Curbing Childhood Obesity and Food Waste
HealthStack – Shared and Jailed HIPAA Hosting $50
Marta Care – Let Us Help When You Can’t
MD Idea Lab – We Build Prototypes for Doctors
Nervcell – The Healthcare Web Browser
Patient Keto – Personalized Keto Medicine and Telehealth
SwipeChart – Rapid EMR Interface
Treatment Scores – Quantifying the Science of Medicine
Treatments – Diagnosed. Now What?
VIDRIO – Google Glass and EMR Interface
- Blog
- Contact
A Step-by-Step Guide to Coding a Personal Health Record
By Stephen Fitzmeyer, MD
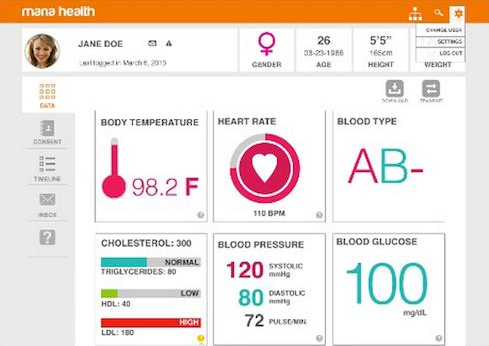
A personal health record (PHR) is a digital tool that allows individuals to maintain and manage their health information in a secure and accessible way. PHRs can be created by healthcare providers or individuals themselves. In this article, we will discuss the steps to coding a PHR.
Step 1: Define the data model
The first step in coding a PHR is to define the data model. This involves identifying the different types of health information that will be stored in the PHR. The data model should include the patient’s demographic information, medical history, medications, allergies, immunizations, laboratory results, and other relevant health information. The data model should also define the relationships between different types of information.
Step 2: Choose a programming language
The next step is to choose a programming language for coding the PHR. There are many programming languages to choose from, including Java, Python, Ruby, and PHP. The choice of programming language will depend on the developer’s expertise, the features required, and the platform on which the PHR will be deployed.
Step 3: Design the user interface
The user interface (UI) is the part of the PHR that patients will interact with. The UI should be intuitive and easy to use. It should allow patients to input and view their health information, as well as update and share it with healthcare providers. The design of the UI should be based on best practices for user experience (UX) and accessibility.
Step 4: Develop the back-end
The back-end of the PHR is the part of the application that handles the storage and retrieval of data. The back-end should be designed to ensure the security and confidentiality of patient health information. It should also be scalable and efficient, to handle large volumes of data and support future expansion.
Step 5: Integrate with other systems
PHRs need to integrate with other healthcare systems, such as electronic health records (EHRs), health information exchanges (HIEs), and patient portals. Integration with these systems will allow patients to access their health information from different sources, and share it with healthcare providers as needed.
Step 6: Test and deploy
Before deploying the PHR, it is essential to test it thoroughly to ensure that it works as expected and meets the needs of patients and healthcare providers. Testing should include functionality testing, performance testing, security testing, and user acceptance testing. Once testing is complete, the PHR can be deployed on a secure platform, such as a cloud-based server or a local server.
Conclusion
Coding a PHR requires careful planning and attention to detail. By following the steps outlined in this article, developers can create a PHR that is secure, scalable, and user-friendly. A well-designed PHR can empower patients to take control of their health information, improve healthcare outcomes, and support the delivery of personalized and coordinated healthcare services.
Author: Stephen Fitzmeyer, M.D.
Physician Informaticist
Founder of Patient Keto
Founder of Warp Core Health
Founder of Jax Code Academy, jaxcode.com
Connect with Dr. Stephen Fitzmeyer:
Twitter: @PatientKeto
LinkedIn: linkedin.com/in/sfitzmeyer/